In my previous blog post I discussed the pattern drafting process and how I determined the amount of fabric needed. So now we are ready to cut out the pattern. Because it is only a full circle skirt, it is quite simple to draw your pattern onto the fabric and cut it out. You basically just need to calculate your radius, using your waist measurement and then add your skirt length. Here is an example of how the pattern will look. For the radius calculation, I use the following calculator https://byhandlondon.com/pages/circle-skirt-app.


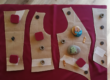
For the underskirt, we repurposed some pink full circle satin skirts from a previous show, so we didn’t need to cut out anything there. Lastly we needed a waistband, so we just cut a long rectangle, the length of the waist and width of the elastic (x2) with seam allowance.
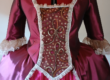
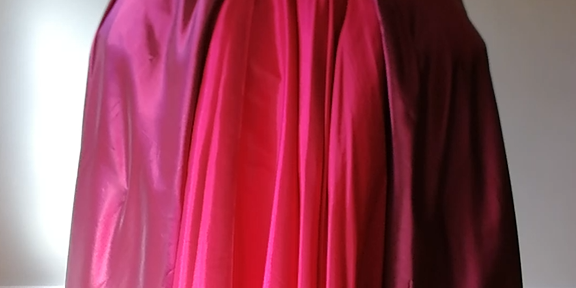
The main crimson Taffeta skirt is cut open down the center front and folded on the princess line, so that it corresponds with the bodice. Next we sewed the three skirt layers to the waistband and added the elastic.
Pro tip: when you’ve inserted your elastic into the waistband, topstitch it in the sides of the waistband so that it prevents the elastic from twisting inside your waistband casing.

When we did our first fitting with the panniers (side hoops), we soon realised we will have to add some fullness in the center front and back, as the fabric laid too flat due to the panniers’ fullness on the sides. So we decided to add two layers of ruffled tulle in those areas which did the trick. We had not budgeted or bought fabric for this, but luckily we had a couple of meters of tulle in the storeroom we could use. I just cut long pieces and used a ruffle foot to gather the tulle.
With the fitting, we folded the bottom open edges of the main Taffeta skirt open to visually continue the princess styleline all the way down, and tacked it at the hem.


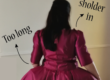
A problem we faced with the waistline…the elastic needed to be quite tight in order to keep the skirt up, because the weight of the fabric pulled the skirt down. The cast member could barely fit the skirt over her shoulders, and luckily we could pull the skirt on over her head instead of climbing into it, we just needed to be extra careful for hair and makeup.
Thanks for reading!
In our next blog post in the NEW Marie-Antoinette series, I will discuss the process of making the bodice, showing you how to use boning and I created a very interesting sleeve pattern that is so easy, but gives a very glamarous look.
Blog posts in the Marie-Antoinette series:
PART 1: Versailles
PART 2: What else can go wrong?
PART 3: How many patterns does it take to make one dress?
PART 4: Creating the drama element…the Skirt
Upcoming blog posts in the Marie-Antoinette series:
PART 5: The most intricate and time consuming part…the Bodice
PART 6: Fitting…the most important step
PART 7: What is a Queen without a train?
PART 8: A gown fit for a Queen!
PART 9: The show must go on
Online Courses
If you are interested in learning how to sew or design your own patterns, sign up for one of our online courses to start in the comfort of your own home. Beginner, Intermediate & Advanced courses available to suit your skill level. Sign up now at https://online.craftchic.co.za/
Digital Patterns
Visit our online store at online store and get your digital pdf patterns for your favourite items. There is a variety of patterns available, including dresses, skirts, tops, pants, casual wear and everyday household items.