As I’ve mentioned in my previous blog post, I drafted the pattern for the Marie-Antoinette costume about 7 months before the show, because I wanted to get it done before we moved. It can be a bit risky to do it this way, because people’s bodies can change a lot over a period that long, which means you will have to do a lot of alterations, but luckily the risk was worth it, because we didn’t need to do any major changes.
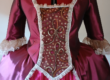
Firstly, we decided on a style, by using a couple of reference images and taking bits and pieces from each to ensure that the design element will portray the right era. We decided on a fitted classic princess style bodice where the styleline comes from the middle of the shoulder instead of under the armhole, because it would make the cut-out of the neckline easier to get that square neckline, which is quite prominent in the 18th century dresses.


Secondly, now that we know what style dress we are making, we needed to take a few key measurements to create the pattern. We focused mainly on the bodice and sleeve. The only measurements we needed for the skirt, was the center front length and the side length. For the side length we needed to take the panniers (side hoops) into consideration, because of the bustle that’s not all the way around, but only on the sides…for only that section, we needed to add about 14cm, that stood out to the side. The last measurements we took was the length of the cape in the back.

Thirdly, I drafted two basic foundation block patterns, a sleeve and a bodice. This is always your starting point whenever you don’t use the drape method to design patterns.


Then I used these basic foundation blocks to draft a torso foundation block. This allows me to create designs below the waist level, whereas the bodice ends in the waist. For the next draft, I altered the torso block to create the classic princess style bodice that we will use.


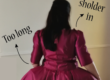
Fourthly, I made a test sloper using muslin to do my first fitting. Luckily the fit was perfect and I could just mark where to do the neckline cut-out and the waist curve in front of the bodice. I decided to keep the torso on the longer side and only to cut it to size once we’ve done a fitting with the skirt and panniers, because I was unsure how much the panniers will push the skirt upwards into the waist, or the amount the skirt might be pulled down by the weight of the fabric. Pro tip: always think about how the different pieces in your garment will work together and effect each other.
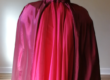
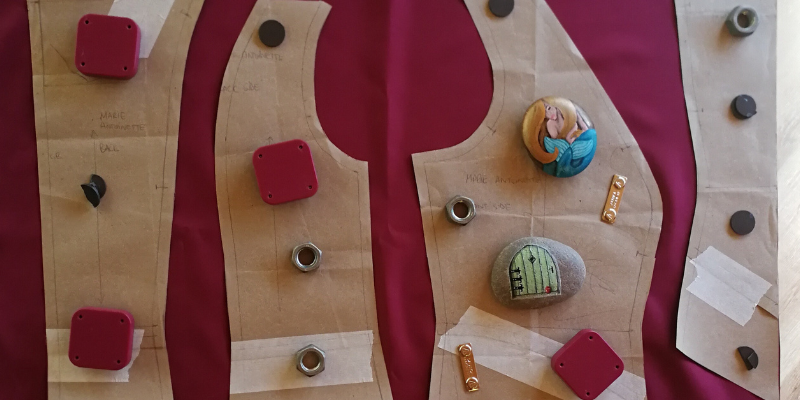
Lastly, I updated the torso pattern after the fitting and needed to calculate the amount of fabric needed. For the skirt we decided to make a full circle skirt, so we used the maximum length, which is the side length, because we needed to add the bustle of the panniers. We knew we wanted to use Taffeta from the curtaining section, so we knew the width of the fabric would be 280cm. Next I just laid out my pattern pieces and added the amount for the skirt. I always add a couple of meters excess, just in case, for this particular costume, it was a big skirt and we had the cape, so we added 2m excess.
Here is a list of the fabric and materials we needed for the Marie-Antoinette costume:
6m Taffeta
75cm Lining
75cm Interfacing
1,5m Boning
60cm Zip
60cm Elastic
Underskirt (repurpose from previouse show)
Embellishments
To answer the question in the heading of this blog post, I drafted 4 patterns for the top section (sleeve, bodice, torso, princess style torso) and then I drafted the skirt and the cape on the fabric itself.
Thanks for reading!
Watch out for our next blog post in the NEW Marie-Antoinette series, where we look at the Skirt part of the gown with all the intricate layers that were envolved in creating the big skirt. Keep a lookout for the final design still to come.
Blog posts in the Marie-Antoinette series:
PART 1: Versailles
PART 2: What else can go wrong?
PART 3: How many patterns does it take to make one dress?
Upcoming blog posts in the Marie-Antoinette series:
PART 4: Creating the drama element…the Skirt
PART 5: The most intricate and time consuming part…the Bodice
PART 6: Fitting…the most important step
PART 7: What is a Queen without a train?
PART 8: A gown fit for a Queen!
PART 9: The show must go on
Online Courses
If you are interested in learning how to sew or design your own patterns, sign up for one of our online courses to start in the comfort of your own home. Beginner, Intermediate & Advanced courses available to suit your skill level. Sign up now at https://online.craftchic.co.za/
Digital Patterns
Visit our online store at online store and get your digital pdf patterns for your favourite items. There is a variety of patterns available, including dresses, skirts, tops, pants, casual wear and everyday household items.